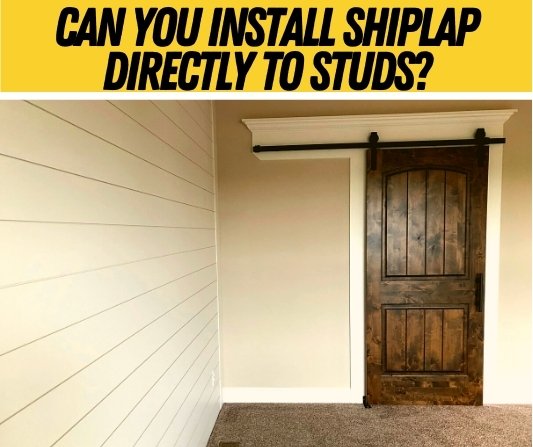
Can You Install Shiplap Directly To Studs (With No Drywall)
Shiplap can add character and aesthetic to a room. Installing shiplap can be a good project for beginners, as it is relatively straightforward and rewarding.
However, you may find yourself in a situation in which you want to install shiplap, but there is no drywall present.
Do you need to install drywall first?
Are there any drawbacks in simply applying the shiplap directly into the studs?
Table of Contents
Can You Install Shiplap Directly To Studs?
You can install shiplap directly to studs, it requires less equipment, and makes the process slightly easier. With no drywall, you can see the frame directly, and don’t need a detector to find the studs for you. However, there is no harm in installing shiplap over drywall, and you shouldn’t think of replacing one with the other. Installing shiplap directly to the studs is slightly different to installing it onto drywall, and so there are some factors you need to be aware before embarking on the task.
Installing shiplap directly to studs
Installing shiplap should take between 2-4 hours, depending on the skill level you pertain, and the size and shape of the room. One of the issues with installing shiplap directly to studs is that the insulation of the room will be poorer compared to when installing shiplap onto drywall. For this reason, you must think about the location and purpose of the room, to determine what you’ll need to put behind the shiplap, i.e. a breathable membrane or insulation.
Another important aspect to remember is that once the boards are up, they are difficult to paint or change in anyway, as the gaps between the boards is minute. For this reason, add any paint of alterations to the render before you put them up. If you paint after they have been placed, you will not be able to fit even the smallest brush between the boards.
The shiplap boards have to be as close together as possible for a clean finish. This is because you do not have any drywall behind, and therefore any gap exposes the room to the inner wall, which makes the room less insulated, more echoey, and not as esthetically pleasing.
Let’s get it done,
Firstly, you’ll need to take the measurements of the wall you want to place the shiplap on, in order to cut the wood into the correct size and shape. Shiplap should be 5-10 in. thick, but is completely down to personal preference. This may mean that the top or bottom plank is slightly smaller, to fit the length of the wall. A baseboard can be used to hide a smaller plank at the bottom. It is best to buy the shiplap after you have done the measurements, and buy a little extra as leeway.
Then, you’ll want to paint the boards if you were planning on doing so. White is a popular color for shiplap as it’s neutral, which means it complements the furniture of any room well, but it also gives the wood a rustic feeling, which is the aesthetic some people hope to attain with shiplap. Primer can be used at this stage on any knots in the wood that look particularly large. Sometimes knots can bleed through the paint, and if you do not want the natural look of wood, you’ll want to put several layers of primer on the knots.
The placing of the first board is the most important part, as it must be perfectly straight. If the board is at any sort of skewed angle, you will ruin the alignment of every other board. You have the benefit of being able to see the studs, and therefore know exactly where you’ll want to place the shiplap. Some people opt to have the boards stretch from one side of the room to the other, while others like to have 2-3 boards make up one row. If you choose the latter, make sure that two adjacent rows do not have boards meeting at the same stud, i.e. stagger the boards up the wall, for aesthetic purposes.
What Tools Will I need to Install Shiplap?
You will need a spirit level, to make sure you’re putting the boards in straight. Do not trust the dimensions of the room, as these are often slightly askew. Obviously shiplap will be needed, which is usually made from woods like cedar or pine. If you’re not painting the wood, you’ll want to consider the color of the wood you’re choosing. Remember: woods change color over the years, so make sure you choose a wood that has a color you’ll be happy with in ten years. Alternatively, staining with stains can be used to retain the aesthetic of woodgrain, while changing the color.
A saw will be needed to cut the wood into the correct shape and sizes. Generally, electric saws work best, as they allow the user to create very precise, straight lines, which is important for this job, as you’ll be working around door frames and light switches. I recommend the use of a miter saw or a jigsaw via the use of a work bench and clamps.
A tape measure is needed to determine the size of the planks you’ll want to be cutting, which will be determined by the height and width of the wall. A nail gun for accurately placing nails is a good tool to speed up the process, and ensure the shiplap is placed correctly. General-purpose nails are fine to use, and are inexpensive at the local hardware store. They should be at least 2-1/2 in., to ensure they securely fit into the studs.
You can install shiplap directly to metal studs as well, as long as your building codes in your state allow it, however you must be aware that you won’t be able to simply nail shiplap to your studs like you would be able to if you had wood studs.
If you do not want to install drywall or plywood over your metal studs than you can attach the shiplap to metal studs with fine thread trim screws + gluing them to metal studs with grab adhesives.
If you were placing shiplap onto drywall, you would be advised to leave a small gap between the boards, using a penny or another thing object to judge the gap. Do not do this when installing onto studs, as this will be the only layer on the wall. You do not want any space between the boards, as it is bad for insulation and aesthetic. Simply layer the next shiplap on top of the previous. Attach to the studs using the nails and the nail gun.
Keep the saw handy as you may need to make adjustments to a board for fitting around fixtures.
Is it Legal To Install Shiplap Directly to Studs?
It depends on several factors. Firstly, it depends what the purpose of the room is. If this is for a shed, or room separate from the house, that can change the conditions of the situation. However, if it is inside the house, then it depends on what country or state you are in, and therefore what the building regulations are. The problem with mounting shiplap directly onto studs is primarily about fire safety. Dry wall usually has a 2 hour fire rating, which means fire takes 2 hours to burn through it. Shiplap will be burnt through very quickly.
It also depends on what the building codes for the property are, you may need to consult the details of the property and ask a friend or professional if you are unsure. Because of the lack of fire protection that shiplap provides a room, some states and building codes will not allow you.
What should I put behind shiplap?
A breathable membrane is a good material to place behind a shiplap, as it allows for the movement of air in and around the room, but is resistant to rain, snow and other external forces. It will help bridge the gap between having no dry wall and giving the room the protection it needs from the elements. That being said, you may also want to place some insulation between the studs, to allow the room to retain heat in the winter. A problem with not having dry wall is the heat loss, but insulation will definitely help the situation.
There are lots of different types of membranes available that can be placed within walls, you must consider the climate you live in and the positioning of the room within the house. If the room has walls that do not border on the outside world, they you may not need diligent protection. Alternatively, if your house is somewhere particularly hot, you’ll want to consider using a UV resistant membrane. There is also the matter of sound proofing, as shiplap is not very sound resistant.
Do you need drywall behind shiplap?
You do not need drywall behind shiplap, unless the building codes for the property or the state law requires you to. However, there are the downsides to not having drywall that you’ll need to consider. Firstly, as previously mentioned, insulation is an issue. Drywall is thicker, less permeable, and is not fragmented like the material making up a shiplap façade. This makes it far more resilient to changes in temperature. Of course, you can place insulation behind the shiplap, but drywall is still more effective at maintaining the inside temperature.
Another consideration is noise. Shiplap is not noise resistant, and nowhere near so compared to dry wall. There are other ways to soundproof the room and neighboring rooms, other than through drywall, but then the room’s décor becomes dictated by sound proofing. If shiplap is placed directly onto the studs, some layers will need to be in between the studs to better sound proof it.
The final consideration for having drywall behind shiplap is the most important. Fire safety should be a primary concern of all house owners and shiplap is not safe enough on its own. Some form of material must go in the walls that is a fire deterrent. There is a reason some states do not allow for building only shiplap onto studs, and why you need to consider fire safety when placing shiplap. No one ever thinks they will be in a fire, which is why a property must be prepared for the possibility of accidents.
Does shiplap usually go over drywall?
Usually, shiplap does go over drywall, and this is for a number of reasons. Often, it is simply because the façade of a room is being changed, and drywall is already in place. It is not beneficial in any way to remove the drywall to place shiplap, so the majority of people simply place it over. This ensures the room is fire safe, insulated, and sound-resistant. You may even find shiplap behind drywall, as shiplap used to be used for the inside of houses, and has seen a resurgence in recent years, due to its aesthetic. So while shiplap may not be as viable as a wall’s building material, evident in its replacement over the years, it still can be used.
The bottom line is: if you have the time, money and resources to install both, you should install both. It’ll make the room more comfortable, as the heat will be better controlled, and safer, due to the fire rating of drywall.

 Shiplap can add character and aesthetic to a room. Installing shiplap can be a good project for beginners, as it is relatively straightforward and rewarding.
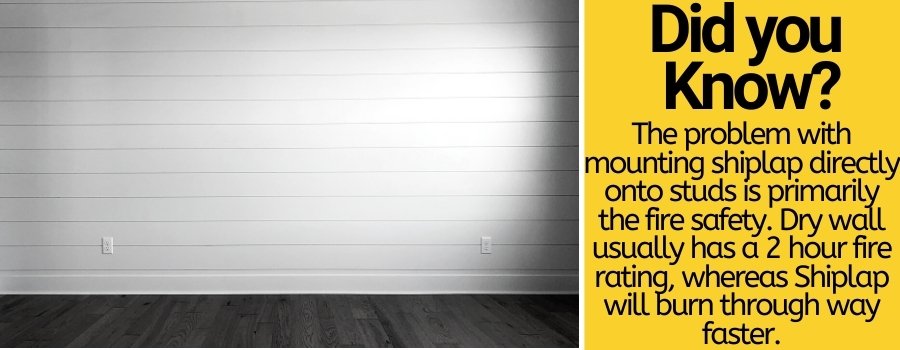


")
")
")
